SUMMARY
This article pertains to Web1040 Pro Summary Features
__________________________________________________________________________________________________________________________________________________________________
Print Checks
This option enables the preparer to print checks for taxpayers who have had their refunds funded through a bank product provider. From the Welcome Page click on Print Check(s) – the program will open directly to the bank’s website.

On the bank’s website, login using the credentials created after being approved by the bank. The check printing process is different for each bank. For assistance in printing an individual check please contact your bank support representative. When contacting the bank, make sure you let them know that the return was prepared using the Web1040 Pro product.
Prior Year Returns
To complete a prior year return in the Web1040 Pro program, select the Change Tax Year drop-down in the top right corner of the login page:
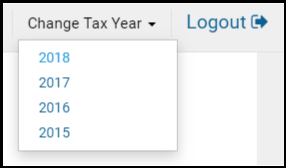
This allows you to toggle between the available years.
NOTE: Web1040 Pro only offers the current and three
prior tax years.
Adding Taxpayer Notes
Preparers can add notes to a tax return so they can review information later. For example, if the preparer adds a Missing Information return tag, they may want to add a note to remind them of what information they still need from the taxpayer. Preparers can either add a taxpayer note while in the return or from the return list.
To add a note while in a tax return, use the following steps:
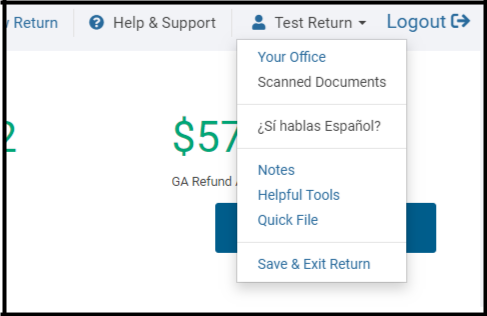
Click the drop-down list under the taxpayer’s name, as shown:
Click Notes.
Web1040 Pro will then display the Add a new note window:
Type a name and the text for the note in the appropriate boxes.

Click Save.
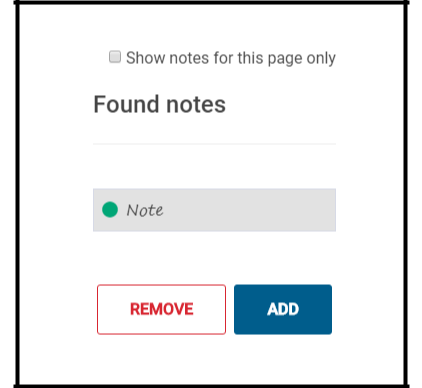
Next, Web1040 Pro will display the Found Notes window:
To add additional notes click Add and use the same steps to add the new note.

To remove a note, select the note and click Remove.
To add a note outside of the return, use the following steps from the Office Client List:
Find the taxpayer in the list and click the Edit Notes icon, as shown below:

This will open the Personal Notes window:
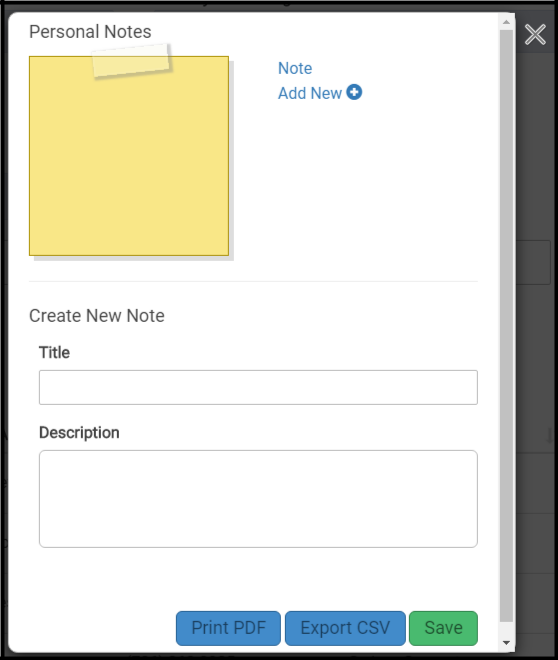
Existing notes can be viewed in the upper right corner and new notes can be added. To add a new note, type the title and description in the appropriate boxes and click Save. After adding notes, click the X to close the window.
Message Center
Preparers can send a message through Web1040 Pro to any of the preparers at their office. To use the Message Center, from the Welcome Page click Message Center.

From the main page of the Message Center, you can review any received messages in the list and create new message to send out.
To create a new message, click Create Message.
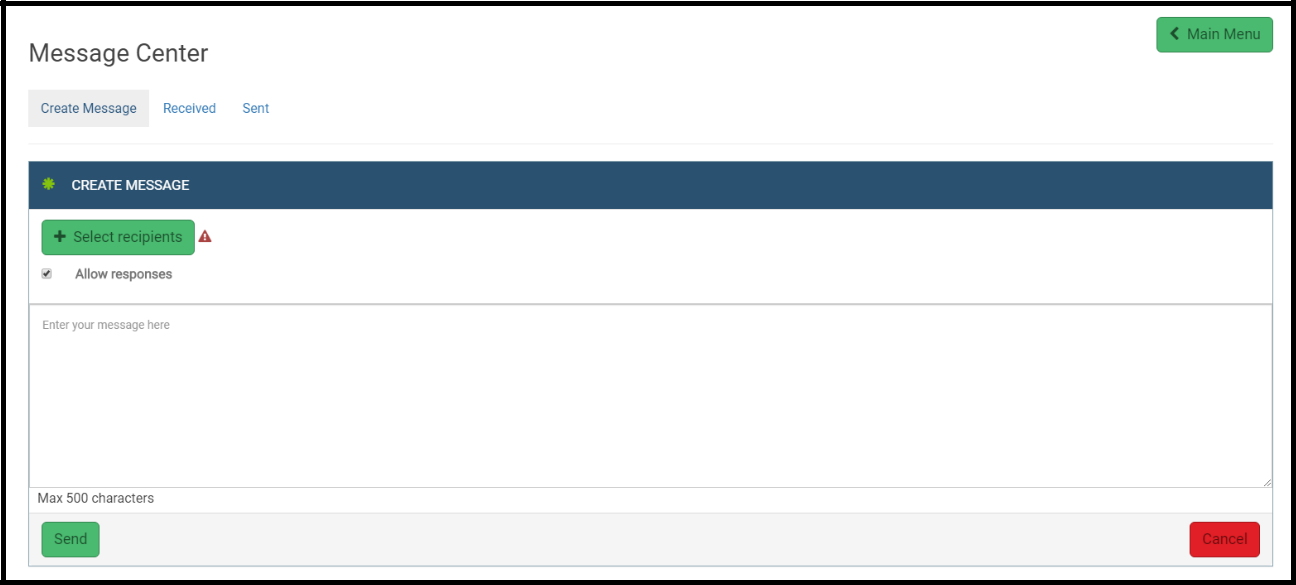
Click Select recipients and select any other in-office preparers to contact via message. Type the message in the message box. Preparers can type up to 500 characters.
When you are finished, click Send.
IRS Website
The IRS website, www.irs.gov is an invaluable tool that is available to assist preparers in everyday tax office situations. From the IRS.gov homepage, preparers can access tools such as Where’s My Refund, Interactive Tax Assistant, and more. Select the Tax Pros tab at the top of the screen to access the most up to date information provided by the IRS to tax professionals.
There are many IRS Resources and Information Topics for Tax Professionals that can be utilized from the Tax Professionals section of the IRS website. From this section of the website, preparers can do the following:
- Access Forms and Publications
- Renew PTIN information
- Subscribe to IRS e-services
- Review the Standards of Practice for Tax Professionals
- Access the Section 7216 Information Center
- Access Reference Materials
- Find Frequently Used Telephone Numbers for Practitioners
E-File Opt Out Form – Form 8948
Form 8948 Preparer Explanation for Not Filing Electronically is to be used by specified tax return preparers to explain why a return is being filed on paper. A specified tax return preparer is a tax return preparer who prepares covered returns and who reasonably expects to file 11 or more returns during a calendar year. There are certain specific exceptions to the above stated E-File mandate and Form 8948 is used to identify tax returns that meet allowable exceptions.
The IRS has imposed an electronic filing mandate on tax return preparers who prepare individual federal tax returns. Any preparer who anticipates filing 11 or more Forms 1040 and 1041 during a calendar year is required to electronically file all the returns that they prepare using IRS E-File. To access the Form, select E-File Opt Out Form from the Helpful Information box. A fill-in version of Form 8948 will display on the screen. Fill out the taxpayer’s name and SSN. Place a checkmark in the box that best describes the reason for not electronically filing the tax return. Several of the exceptions require additional information to be filled out. Be sure to complete all relevant lines to include any fill in spaces provided.
Form 8948 should be attached to the paper tax return that is prepared and furnished to the taxpayer for the taxpayer’s signature. Form 8948 must be filed with the paper return. In addition to Form 8948, the tax preparer should have the taxpayer sign a taxpayer choice statement indicating that they request to have their return filed on paper by the tax preparer. The taxpayer choice statement should be kept with any in-office records. It should not be attached to the tax return or sent to the IRS.
Several allowable exceptions to the E-File mandate follow:
- The taxpayer chose to file the tax return on paper
- The preparer received a waiver from the requirement to electronically file the return
- The preparer is a member of a recognized religious group that is conscientiously opposed to filing electronically
- The tax return was rejected by IRS E-File and the reject condition could not be resolved
- The preparer’s E-File software package does not electronically support a specific form attached to the tax return
- The preparer is ineligible to file electronically because IRS E-File does not accept foreign preparers without social security numbers who live and work abroad
- The preparer is ineligible to participate in IRS E-File
Additional information on IRS E-File can be found by visiting IRS.gov.
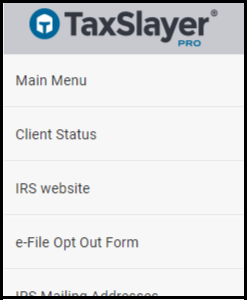
To access the Form 8948 in Web1040 Pro, from the Welcome Page select the E-File Opt Out Form from the left side of the page. This will generate a PDF of the form that you can print out.
File an Amended Return
The Amended Return menu is available from within the Tax Return. Any amended return(s) cannot be E-Filed, and a copy of the original return(s) must be mailed with the amendment(s).
From inside of the program on the left-side navigation options you will see the option 20XX Amended Return. Selecting that option will open the Amended Tax Return - Form 1040X Menu. There are seven
- menu options to select from. For detailed step-by-step instructions on preparing an Amended Return start by selecting How to Amend Your Return.
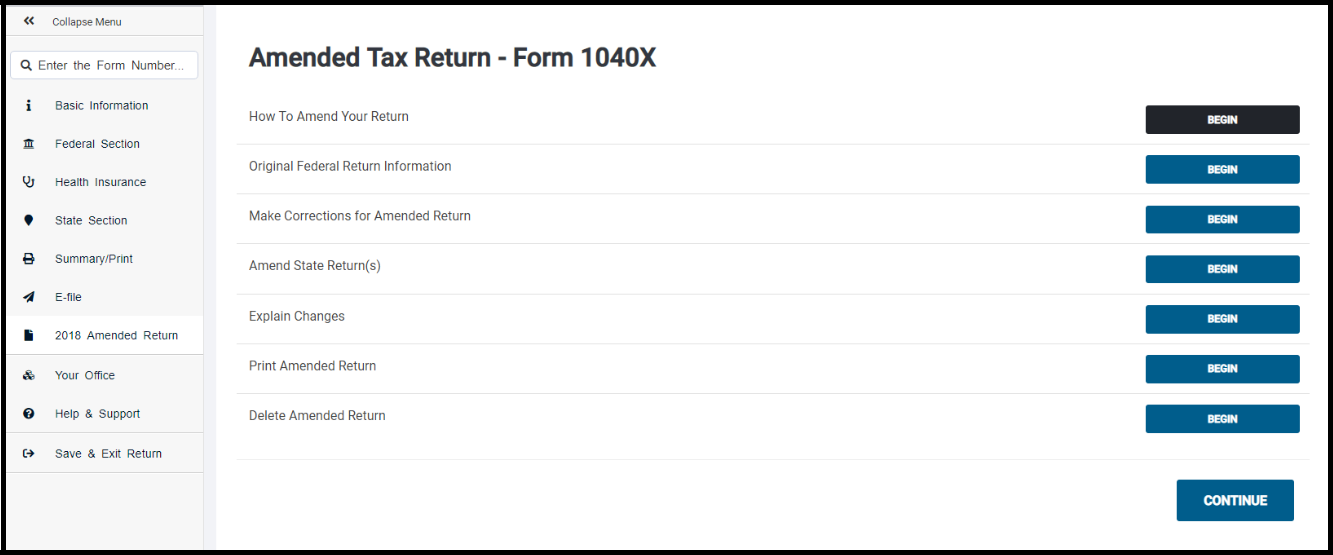
To begin an amended return, the preparer will need to populate the Original Federal Return Information. Access this input screen by selecting Original Federal Return Information. If the original return was submitted electronically through the tax program from the same office, this column will auto-populate with the original tax return information. Otherwise, the preparer will need to manually input the figures in this column. Select the Where is this located? link for details or navigation assistance.

After completing the input of the original column, select the Continue button. This will navigate back to the Amended Tax Return – 1040X Menu. Select Make Corrections for Amended Return and then select the Continue button. This will navigate to the Summary page of the tax return. Select the Show Details link next to any entry to add, edit, or remove information as needed. Only edit or enter information that was incorrect or omitted on the originally filed return.
After making all necessary changes, select File 20XX Amended Return from the upper right-hand corner of the screen. The program will navigate back to the Amended Tax Return – Form 1040X Menu where the preparer can create a state amended return, if applicable, and/or enter an explanation of changes for the amended return.
Explain Changes
Select the BEGIN button next to Explain Changes to enter an explanation for amending the original tax return. Be descriptive and make sure to list each change that appears on the form. After entering these explanations, select Continue.
Creating an Amended State Return
Select Create Amended State Return to make changes to the original accepted state tax return. Edit the state return that requires changes. The preparer can return to this menu later if they need to file more than one state amended return.

Next, select the Begin button next to Amended Return. The information entered in the menus below will aid in completing the amended state return.
To create the state amended return, from the drop-down menu provided select ‘Yes’ and select the BEGIN button next to Review and Complete Amended Return. If the state return was created and E-Filed in the Tax Program in the same office, the figures from the accepted state return will auto-populate to the original column on the state amended return. Depending on the state, there will be several menu options to choose from pertaining to the amended state return. Select the BEGIN buttons next to each item listed and fill out all applicable information.
After entering applicable information for the state amended tax return, select Continue. Return to the Summary section of the tax return to print the state amended tax return.

To print both the federal and/or state amended return(s) select the BEGIN button next to Print Amended Return. Select Continue to create the PDF. Clicking “Continue” will generate a PDF document of the Form 1040X, along with the supporting forms that must be attached to the amended return. Be sure to review the Form 1040X to ensure that the necessary corrections are reflected appropriately. After verifying that the corrections are entered as needed, print the entire document that opens. The taxpayer should mail the 1040X, all the federal forms that print, and any additional tax statements (such as W2s, 1099s, or 1098s) to the appropriate address.
Any state amended returns will also be included in the PDF document. It is recommended that preparers print the entire PDF document and have the taxpayer mail all state forms to the address given by the state.
After printing the amended return(s), select the Continue button.
Depending on the state, the mailing address is on the form. Also visit the IRS and/or State website to search for Where to File.
Deleting an Amended Return
To delete an amended return, select the BEGIN button next to Delete Amended Return. The program will confirm the intent to delete the amended return and the preparer will be prompted to change the return back to its original state prior to any changes.
Federal and State Calculated Refund / Amount Due
The tax program keeps track of the calculated refund or amount due and displays the current dollar amount on the right-hand side of the screen. These figures will start calculating as soon as the return is created.
Refunds for both Federal returns and State Returns will show in green and any amount due will show in red.
Tools
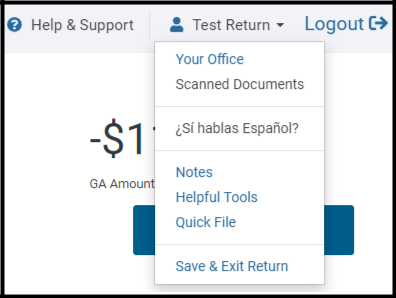
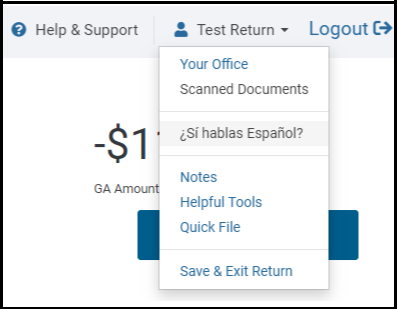
By selecting the drop-down arrow next to the Taxpayer’s name, the preparer will be given the choice to view the menus and chose to go back to Your Office, Scan Documents, change the software’s
language to Spanish, enter Notes, view Helpful Tools, Quick File and Save & Log Out.
Change Language
By selecting the drop-down arrow next to the Taxpayer’s name, the preparer will be given the choice to view the menus and print supported forms in English or in Spanish.
Scanned Documents
This option is used for temporary storage for remote reviewing purposes only and is not a permanent storage solution. Make sure to keep local copies of documents for long term storage or save them in the computer.
NOTE: Saving to the computer is not necessarily an encrypted method of saving information.

Contact Us
This option includes Support contact information such as support hours, phone number, and email address.
Helpful Tools
This option will contain links to the Knowledge Base, the User Manual, IRS Forms & Publications.
Notes
This option allows the preparer to leave notes or placeholders in reference to the Taxpayer’s return.
The preparer will be notified of all Reminder Notes before you E-File the tax return.
Quick File
This option allows the preparer to quickly access forms and schedules used in the return.
NOTE: Begin typing the form name or description in the box below then select the form or forms to visit. The preparer will have the opportunity to enter additional items at the end of this process. After completing the list, select CONTINUE and the software will guide the preparer to the relevant entry menus.

7216 Consent to Use / Consent to Disclose
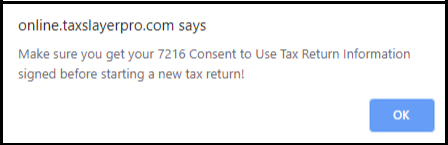
When a preparer starts a new tax return, they will be prompted to have the taxpayer sign a 7216 - Consent to Use Tax Return Information form. The 7216 Consent to Use of Tax Return Information included in the software is provided with no inherent warranty. It may not satisfy any legal obligations pursuant to IRC §7216. It is suggested that preparers use the provided consent to use of tax information as a guide in creating their own 7216 disclosures.
New regulations under IRC §7216, Disclosure or Use of Tax Information by Preparers of Returns, became effective on January 1, 2009. The statute limits tax return preparers’ use and disclosures of information obtained during the return preparation process to activities directly related to the preparation of the return. The regulations describe how preparers, with the informed written consent of taxpayers, may use or disclose tax return information for purposes other than preparation of the tax return. Specific and limited exceptions that allow a preparer to use or disclose return information for other purposes are also described in the regulation.
IRS regulations under IRC §7216 apply to all:
- Paid Preparers
- Software developers
- Electronic Return Originators
- Other persons or entities engaged in tax return preparation services or services that are auxiliary to return preparation, and
- Volunteer tax preparers, for example Volunteer Income Tax Assistance (VITA) and Tax Counseling for the Elderly (TCE) volunteers and employees and contractors employed by tax preparation companies in a support role.
Revenue Procedure 2008-35 provides specific form and content guidance to tax return preparers for obtaining consents to disclose and consents to use taxpayer data in both the paper and electronic environments. Generally, tax preparers must obtain the signed consent of the taxpayer before they can disclose taxpayer return information to anyone or use it for any purpose other than in the context of preparing the tax return. Separate consents are required for disclosure(s) and use(s). Consent forms may contain multiple uses and multiple disclosures However, do not include consent for use and consent for disclosure on the same form.
Consents to Use / Disclose must:
- Clearly identify the intended purpose of the disclosure or use.
- Identify the recipient(s) and describe the particular authorized information to be disclosed or used.
- Include the name of the tax return preparer and the name of the taxpayer.
- Include the applicable mandatory language set forth in §4.04(a)-(c) of Revenue Procedure 2008-35 that informs the taxpayer that he is not required to sign the consent and if he signs the consent, he can set a time period for the duration of that consent;0
- Include the mandatory language set forth in §4.04(d) of Revenue Procedure 2008-35 that refers the taxpayer to the Treasury Inspector General for Tax Administration (TIGTA) if he believes that his tax return information has been disclosed or used improperly; Where applicable Procedure 2008-35, include the appropriate mandatory statement set forth in §4.04(e) of Revenue that informs the taxpayer that his tax return information may be disclosed to a tax return preparer located outside the U.S;
- Be in 12-point type on 8 ½ by 11” paper.
- Contain the taxpayer’s affirmative consent (as opposed to an ‘opt-out” clause); and
- Be signed and dated by the taxpayer.
All consents to disclose tax return information must contain the following statements in the following sequence:
Federal law requires this consent form be provided to you. Unless authorized by law, we cannot disclose, without your consent, your tax return information to third parties for purposes other than the preparation and filing of your tax return and, in certain limited circumstances, for purposes involving tax return preparation. If you consent to the disclosure of your tax return information, Federal law may not protect your tax return information from further use or distribution.
You are not required to complete this form. Because our ability to disclose your tax return information to another tax return preparer affects the service that we provide to you and its cost, we may decline to provide you with service or change the terms of service that we provide to you if you do not sign this form. If you agree to the disclosure of your tax return information, your consent is valid for the amount of time that you specify. If you do not specify the duration of your consent, your consent is valid for one year.
All consents to use tax return information must contain the following statements in the following sequence:
Federal law requires this consent form be provided to you. Unless authorized by law, we cannot use, without your consent, your tax return information for purposes other than the preparation and filing of your tax return.
You are not required to complete this form. If we obtain your signature on this form by conditioning our services on your consent, your consent will not be valid. Your consent is valid for the amount of time that you specify. If you do not specify the duration of your consent, your consent is valid for one year.
All consents whether for use or for disclosure must contain the following statement: If you believe your tax return information has been disclosed or used improperly in a manner unauthorized by law or without your permission, you may contact the Treasury Inspector General for Tax Administration (TIGTA) by telephone at 1-800-366-4484, or by email at [email protected].
Form 8822- Change of Taxpayer’s Mailing Address
Purpose of Form - Use Form 8822 to notify the Internal Revenue Service if the taxpayer changed their home mailing address. If this change also affects the mailing address for the taxpayer’s children who filed income tax returns, complete and file a separate Form 8822 for each child. If there is a representative signing for the taxpayer, attach to Form 8822 a copy their Power of Attorney. Generally, it takes 4 to 6 weeks to process a change of address. Use Form 8822-B to change a business address.
Prior Name(s) - If the taxpayer or spouse changed their name, complete line 5. Also, be sure the taxpayer notifies the Social Security Administration of their new name so that it has the same name in its records that appear on the tax return. This prevents delays in processing the return and issuing refunds. It also safeguards any future social security benefits.
Addresses - Be sure to include any apartment, room, or suite number in the space provided. P.O. Box
- Enter the box number instead of the street address only if your post office does not deliver mail to the street address.
Foreign Address - Follow the country’s practice for entering the postal code. Please do not abbreviate the country.
“In Care of” Address – For taxpayers whose mail goes to a third party (such as an accountant or attorney), enter “C/O” followed by the third party’s name and street address or P.O. box.
Signature - The taxpayer, executor, donor, or an authorized representative must sign. If the taxpayer’s last return was a joint return, the spouse must also sign (unless the preparer has indicated by checking the box on line 1 that the taxpayer is establishing a separate residence).